In the first article, we discussed exploration of API released with Microsoft Dynamics NAV 2018.
As we knew from the last article we read the Microsoft document says that there are 44 API released in Base Microsoft NAV. Let's see how we can access that list and how to configure API.
To Start with Microsoft have added a page API Setup (5469) to initialize of update all APIS defined in NAV Objects.
Don't get confuse with data in this page, we need to focus on action Integrate API as shown below.

So what will happen if we click on it -
1. System will look for all subscriber of the Published Event "ApiSetup" in Codeunit Graph Mgt - General Tools.
2. For Every Subscriber if it is API then system will Add or Update Integration Records for API's.
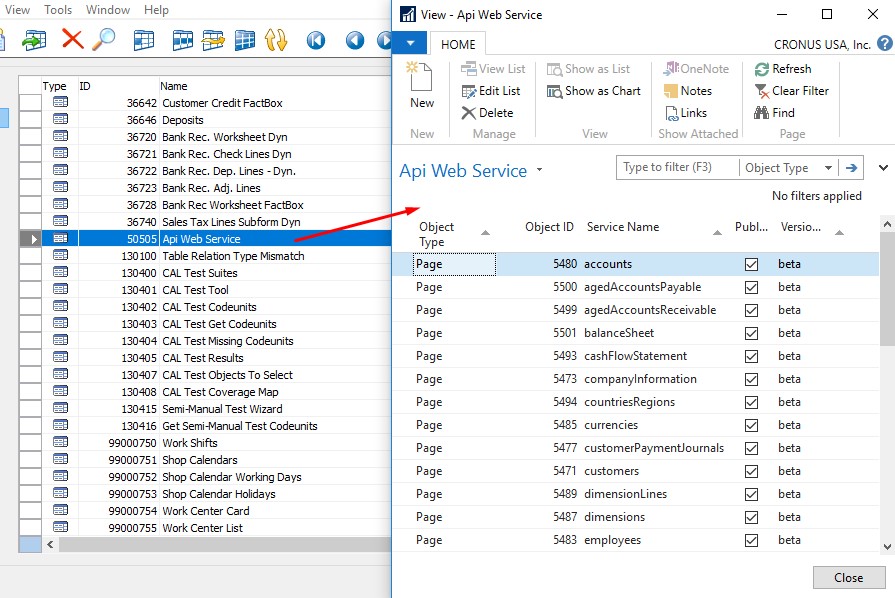
Next step is to check APIs which are added or updated. As in previous article we see that Microsoft added a new virtual table in NAV 2018 - 2000000193 (Api Web Service). Lets create a list page based on this table and see the data inside this as shown below.
Now after finding information from MSDN to access any of these API's below is the format to access. http://<<Server Name>>:<<OData Port>>/<<Service Name>>/api/beta
In my case, it is - http://localhost:11048/DynamicsNAV110/api/beta
Lets try to access is and see results.

1. Service Default Company. -- Company Name that will be used to get/post data from API's.
2. Enable API Services. -- Enable API Service to get results from URL used above.
3. Enable ODATA Services. -- Enable Odata as API depends on ODATA Services.
4. OData Base URL. -- The public URL for accessing OData services.
5. Port. -- Will be used in the URL Above.

So lets try to access the base URL again and see a list of pulished API in Microsoft Dynamics NAV 2018. As highlighted 44 published API is displayed on the page.

In Next article we will try to see demo of how we can use these standard API. That may not be the how we will actually use it but a simple demo and then i will leave it with everyone open mind to use it further.
Let me know your views.
Regards,
Saurav Dhyani
Comments
Post a Comment