In this article we will discuss about installing a new version of extension on-prem & docker containers.
With Extension model, when we change apps that we build for our customers, there are certain steps to be followed for Installation of new version of app in tenant.
This is based on a question that received on email. You will need to follow steps in same order when there a new version of Per Tenant Extension (PTE) or ISV/Apps on-Prem version.
For this demo, I will build an app called "Upgrade Extension Demo".
1. Assuming that version 1 of app is installed in the tenant as shown below.
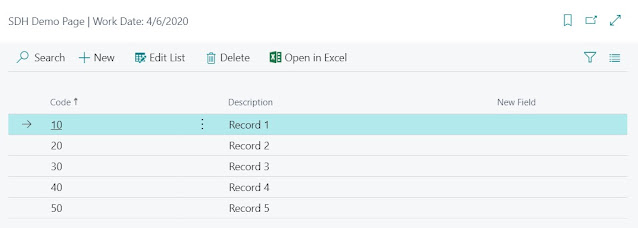
2. A table which is part of the extension also have data as shown below.
3. Adding a new feature in app. During addition of that feature I also updated the app version to 2.0 (as shown below).
4. To Publish to new version of app we will have to running following PowerShell command in this order.
- Un-install old app.
- Publish New app.
- Sync New app.
- App Data upgrade.
- Unpublish old app.
For Reference -
Uninstall app - Does not remove data from the tenant.
For the Demo I am using docker environment so commands are bit different then local environment.
Docker Commands (as shown below) -
- Uninstall-BcContainerApp
- Publish-BcContainerApp
- Sycn-BcContainerApp
- Start-BcContainerAppDataUpgrade
- Unpublish-BcContainerApp
5. After all commands are executed, we will see Version 2 of app available in tenant.
6. Let's check the data in the table. As we can see below data is still exist in table with a new field added.
If you are using on-Prem server then commands are (after loading module) -
- Uninstall-NavApp -ServerInstance Servicename -Name AppName
- Publish-NavApp -ServerInstance Servicename -Path NewAppPath
- Sync-NavApp -ServerInstance Servicename -Version AppNewVersion -Name AppName
- Start-NavAppDataUpgrade -ServerInstance Servicename -Version AppNewVersion -Name AppName
- Unpublish-NavApp -ServerInstance Servicename -Version AppOldVersion -Name AppName


Thank youn Saurav, I think in last screen shot, a small correction required, in Sync NavApp command, it should have the new App name not the one which get uninstall
ReplyDeleteIn my Scenario the new and old app name is same.
DeleteIf you have changed the name then you should change the name in publish, sync and install commands.