Hi all,
As we have multiple RTC Clients, can't we have multiple Web Clients?
A instance of web client run for a single company at a time. What if we require web client for multiple companies.
OR
What if we want to have multiple web clients for two different databases.
Let's try to do it.
1. Open IIS and check the property of NAV Website published as shown below.

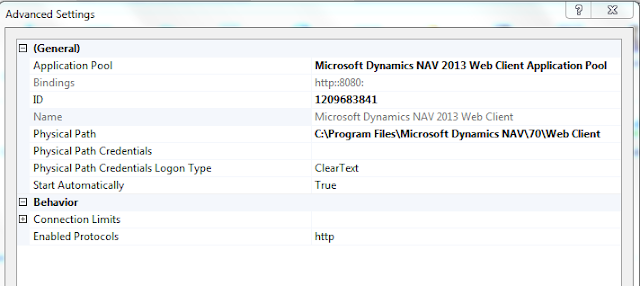
2. Setting shows me that it pulls the client information from a folder inside C:\Program Files\Microsoft Dynamics NAV\70.
3. Navigate to C:\Program Files\Microsoft Dynamics NAV\70.
4. Copy and Paste the web client folder at same location and rename it to Web Client 2 as shown below.

5. Open the new created folder.
6. Open File web.xml and search for <DynamicsNAVSettings>.
* Information about navision client are defined under this tag.
7. Information shown under <DynamicsNAVSettings> are shown below.

8. Let's try to change the Server Instance and Client Service port, to connect it to different database.
* If you are planning to do it for a different company just add company name in Company Parameter.
9. My Service Instances (as shown below)-
a) DynamicsNAV70 - Port No(7046) - FOR NAV 2013 W1
b) DynamicsNAV70IN - Port No(7146) - FOR NAV 2013 IN

10. For My File for Web Client 2 after changes look like this.

11. Open the IIS Manager. Right Click Sites and select Add Web Site..

12. In the window add following information -
Site Name - Name you want to refer to website.
Physical Path - Path of new folder created
(C:\Program Files\Microsoft Dynamics NAV\70\Web Client2).
Port No - A different Port, as port 80 is already assigned.

13. Click Ok and you will find site in left panel.
14. Right Click Website, under manage Web Site select Stop and select start.
15. Web Site have been successfully hosted.
We will discuss conman issues in next post that you will face while running another instance of web client in next post.
Next Part For Issue Resolution.
Regards,
Saurav Dhyani
As we have multiple RTC Clients, can't we have multiple Web Clients?
A instance of web client run for a single company at a time. What if we require web client for multiple companies.
OR
What if we want to have multiple web clients for two different databases.
Let's try to do it.
1. Open IIS and check the property of NAV Website published as shown below.


2. Setting shows me that it pulls the client information from a folder inside C:\Program Files\Microsoft Dynamics NAV\70.
3. Navigate to C:\Program Files\Microsoft Dynamics NAV\70.
4. Copy and Paste the web client folder at same location and rename it to Web Client 2 as shown below.

5. Open the new created folder.
6. Open File web.xml and search for <DynamicsNAVSettings>.
* Information about navision client are defined under this tag.
7. Information shown under <DynamicsNAVSettings> are shown below.

8. Let's try to change the Server Instance and Client Service port, to connect it to different database.
* If you are planning to do it for a different company just add company name in Company Parameter.
9. My Service Instances (as shown below)-
a) DynamicsNAV70 - Port No(7046) - FOR NAV 2013 W1
b) DynamicsNAV70IN - Port No(7146) - FOR NAV 2013 IN

10. For My File for Web Client 2 after changes look like this.

11. Open the IIS Manager. Right Click Sites and select Add Web Site..
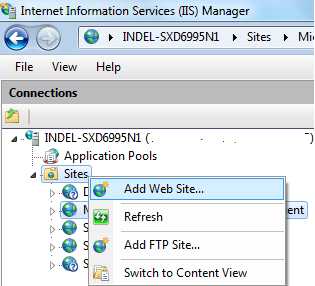
12. In the window add following information -
Site Name - Name you want to refer to website.
Physical Path - Path of new folder created
(C:\Program Files\Microsoft Dynamics NAV\70\Web Client2).
Port No - A different Port, as port 80 is already assigned.

13. Click Ok and you will find site in left panel.
14. Right Click Website, under manage Web Site select Stop and select start.
15. Web Site have been successfully hosted.
We will discuss conman issues in next post that you will face while running another instance of web client in next post.
Regards,
Saurav Dhyani
Comments
Post a Comment